Sunday, August 8, 2010
Truffles
Ingredients:
(1) 1 bag of Dark Chocolate melts (candy making chocolate, you can buy it at Party City or Michaels). I had to use semi sweet chocolate chips because the recipe had to be nut free for work and the baking chocolate was made in a factory with peanuts. It worked just fine.
(2) 1 pound packages of Oreos
(3) 8 oz of Cream Cheese
Directions:
(1) Let the cream cheese sit out a little so it is soft
(2) Dump all the Oreos into a ziploc bag, seal the bag and then smash the oreos into crumbs (I used a heavy coffee mug to do the smashing). Be careful because my bag ripped in a few spots, so my counter got a bit messy. I think maybe smashing less Oreos at a time would be a good idea. I stuck both packages in the bag at the same time.
(3) In a large bowl mix the Cream Cheese and Oreo Crumbs with an electric mixer until no white is visible. That takes a lot of arm work and a lot of time to thoroughly blend them together. It will look like it is impossible when you start out, but stick with it. My mixer wasn't big enough to handle all of it at once, so I had to scoop some out and add it in again later. This step was annoying, messy, and took forever, but it was worth it!
(4) When you are done mixing put the dough in the fridge for about 20 minutes.
(5) Melt the chocolate melts in the microwave stopping to stir every 30 seconds until they are all melted.
Once the dough is cold enough and chocolate is melted, create 1 inch round balls with the dough (I do it the same way I made balls out of play doh when I was younger, just roll it around in your hands.) Then dunk the ball into the chocolate and spoon out onto a tray that is covered with Parchment Paper (the chocolate will not stick to the paper and will just peel off). Once they are dry (I popped mine into the fridge for awhile to speed this up) peel them off and put them in a tupperware container. You should keep them in the fridge.
These truffles are really rich and chocolately, but sooo good! My personal opinion is that you can't have more than 1 or maybe 2 at a time, but everyone I know that has tried these loves them! I'll be sure to let you all know if I win the bake-off this week! :)
Tuesday, December 22, 2009
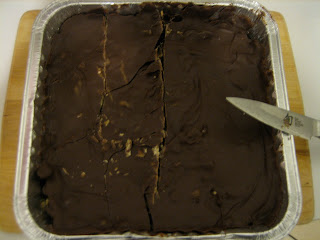
Homemade Candy!

- 1 8 x 8 pan 1 stick of butter
- 3/4 cup of brown sugar
- 1 cup crushed nuts. I used walnuts, but you can use pecans of whatever you want! I also tend to just pour in almost the entire bag because 1 cup doesn't cover the bottom of the pan and I don't like that.
- 2 cups of chocolate chips. I used milk chocolate chips, but you can use semi sweet as well. I personally hate the taste of semi sweet.
Tuesday, January 20, 2009
Cream Cheese Pie
Cream Cheese Pie
Ingredients:
- 1 8oz. cream cheese
- 8oz. (1/2 pint) heavy whipping cream
- 1 teaspoon of vanilla extract
- 1/2 cup of confectioner's sugar
- 1 pie shell (I prefer Oreo or Nilla wafer)
Directions:
Gather all your ingredients
Combine everything except the vanilla extract
Beat everything together and add in the vanilla extract while beating.
You will need to beat the filling until it's REALLY thick. I'm not sure how good this picture will be in helping, but it needs to be super thick. So thick that you can make tracks in it and they will stay. If you don't beat it enough, the pie will be very runny.
Scoop the filling into the pie shell
Smooth over evenly, and you're done! You can sprinkle chocolate chips, heath bar, sprinkles, ect over the top if you'd like. I personally like it better plain. I think adding stuff makes the texture weird, but that's just my opinion.
While cooking, it never hurts to wear a super cute apron like this one I got at Williams-Sonoma this past summer!


